
Table of Contents:
You can manage your investment directly from the portal's homepage, which is available immediately after logging in. If you are currently in a project view, click the SkySnap logo to return to the main dashboard and edit your selected site.
Editing a site
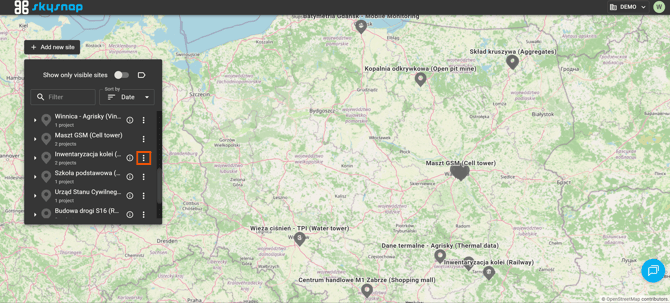
1. Find the specific site in the left sidebar. Click the three-dots icon next to its name.
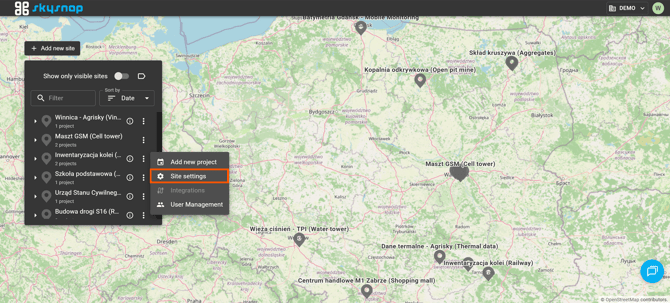
2. Select "Site settings" from the newly opened window.
3. You will see the site editing panel.
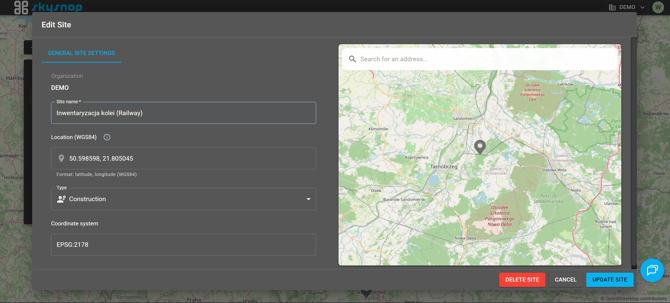
In this section, you can change:
-
site name,
-
pin location,
-
site type,
-
site coordinate system.
TIP: If you are unsure which site type is suitable, please read the article on site types.
4. Confirm your changes by clicking the "Update site" button.
Managing site users
1. Find the specific site in the left sidebar. Click the three-dots icon next to its name.
2. Select "User management" from the newly opened window. 
3. In the "Managing site users" panel, click the "Add user" button. 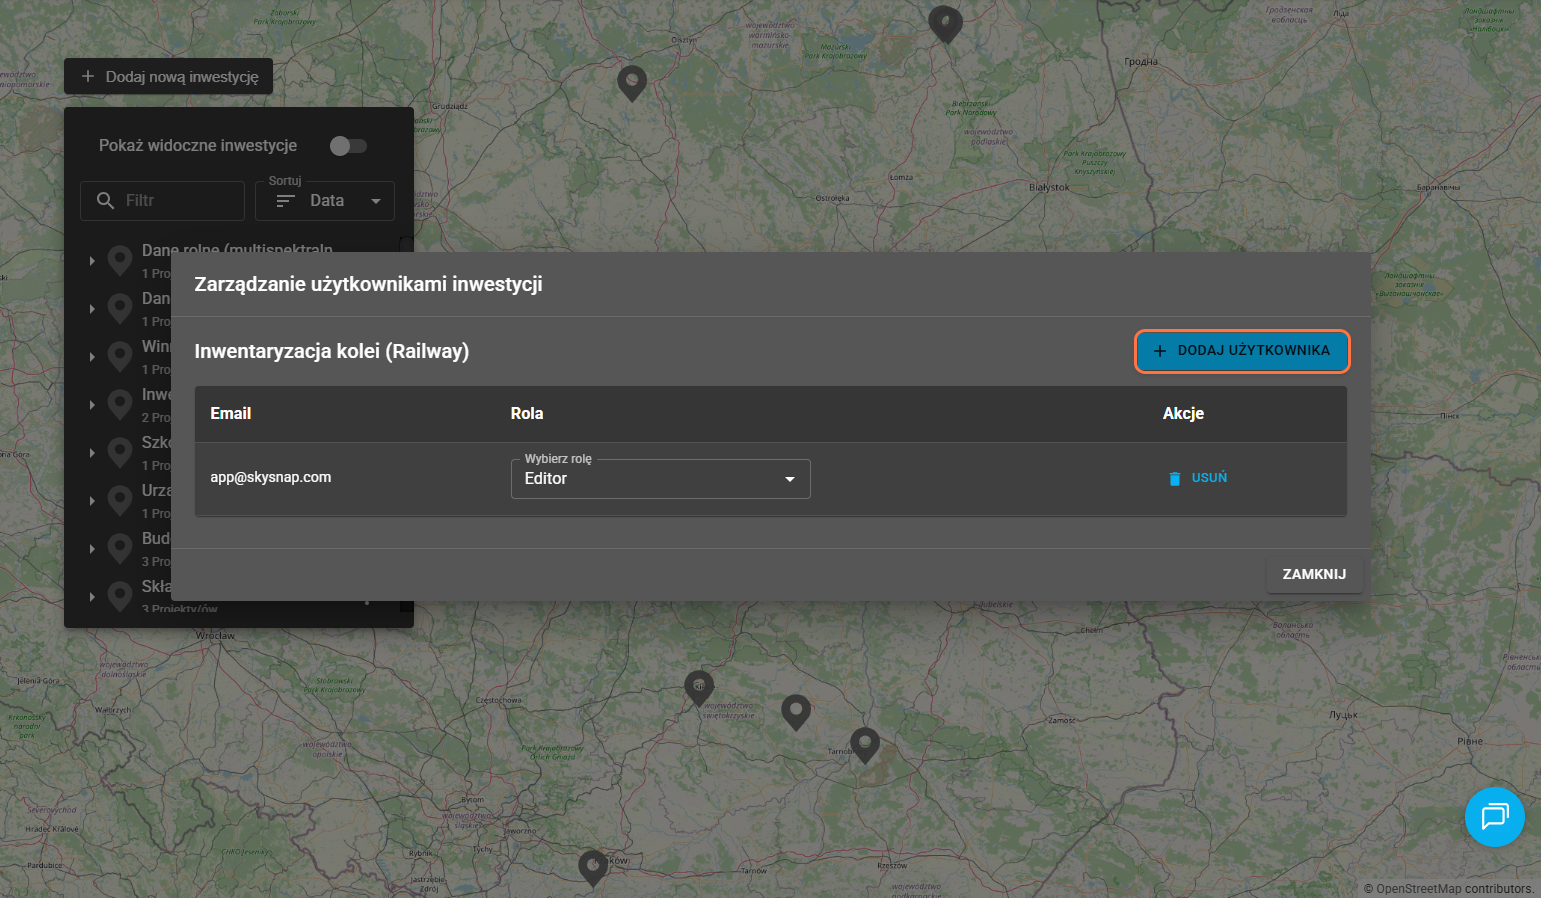
In the management window, you will find a list of users and their roles within the site. Editing and adding users is also possible from this view. After clicking the "Add user" button, a window with the same name will open.
4. Enter the details for the new site user. 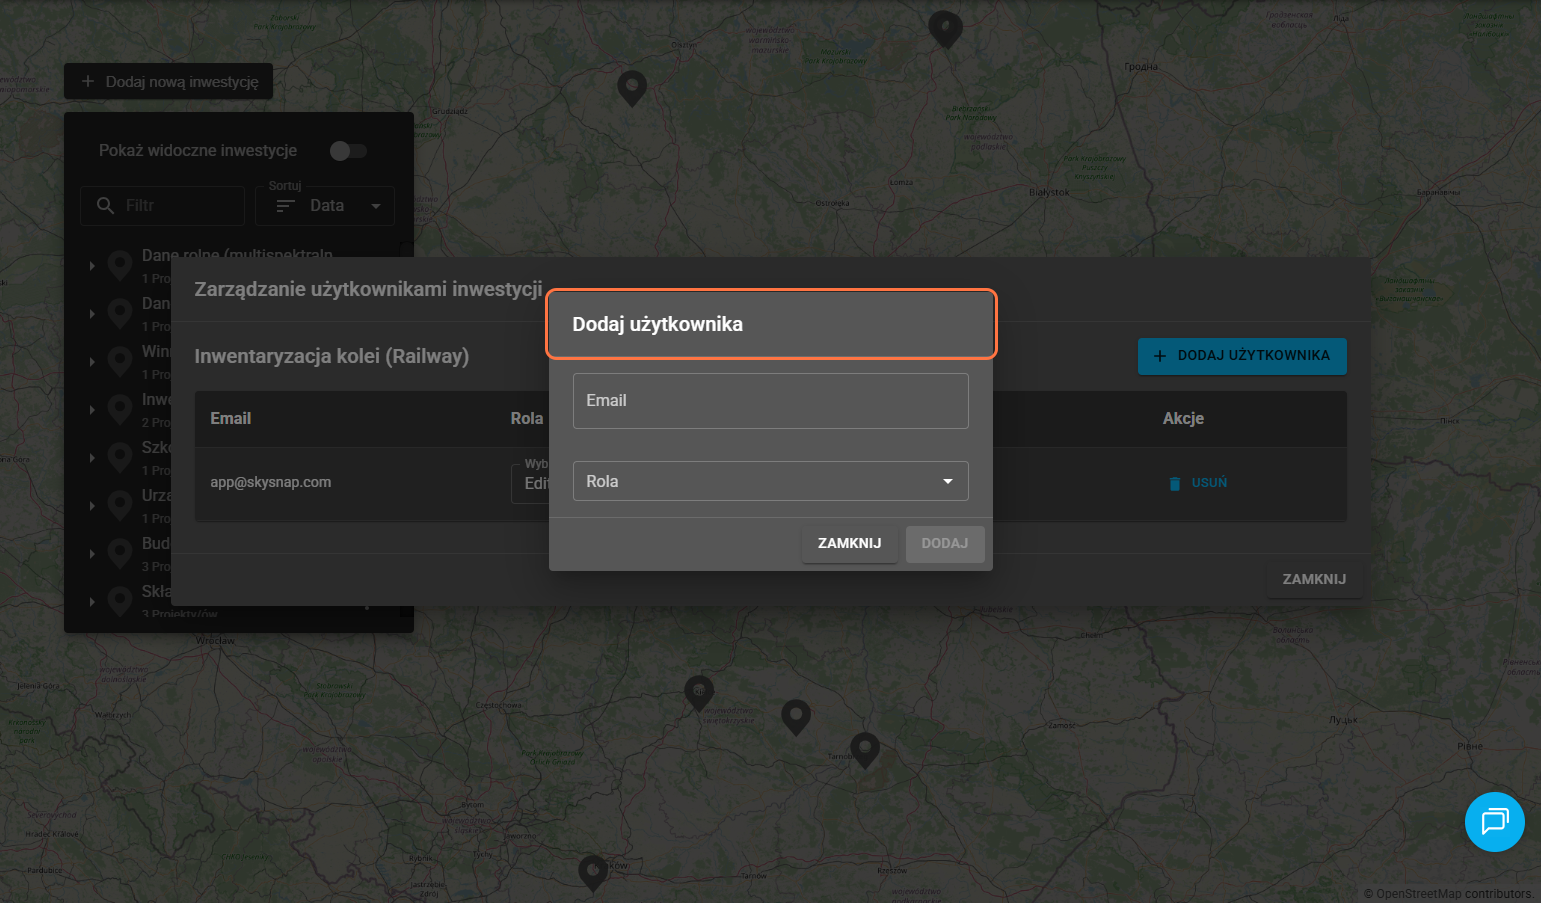
Fill in the email address of the new member. Also, select this person's role from the drop-down list by clicking the arrow in the "Role" field.
There are three user roles available to be added to a site:
-
Editor,
-
Viewer,
-
Manager.
TIP: If you are unsure about the permissions assigned to each user role, please read the article describing user roles in the SkySnap portal.
5. Click the "Add" button.