
SITE – represents the primary level of data organization. Your organization can contain multiple sites, and each of them will be marked with a pin on the main map view.
Steps to create a site
1. In the main panel, click the "Add new site" button.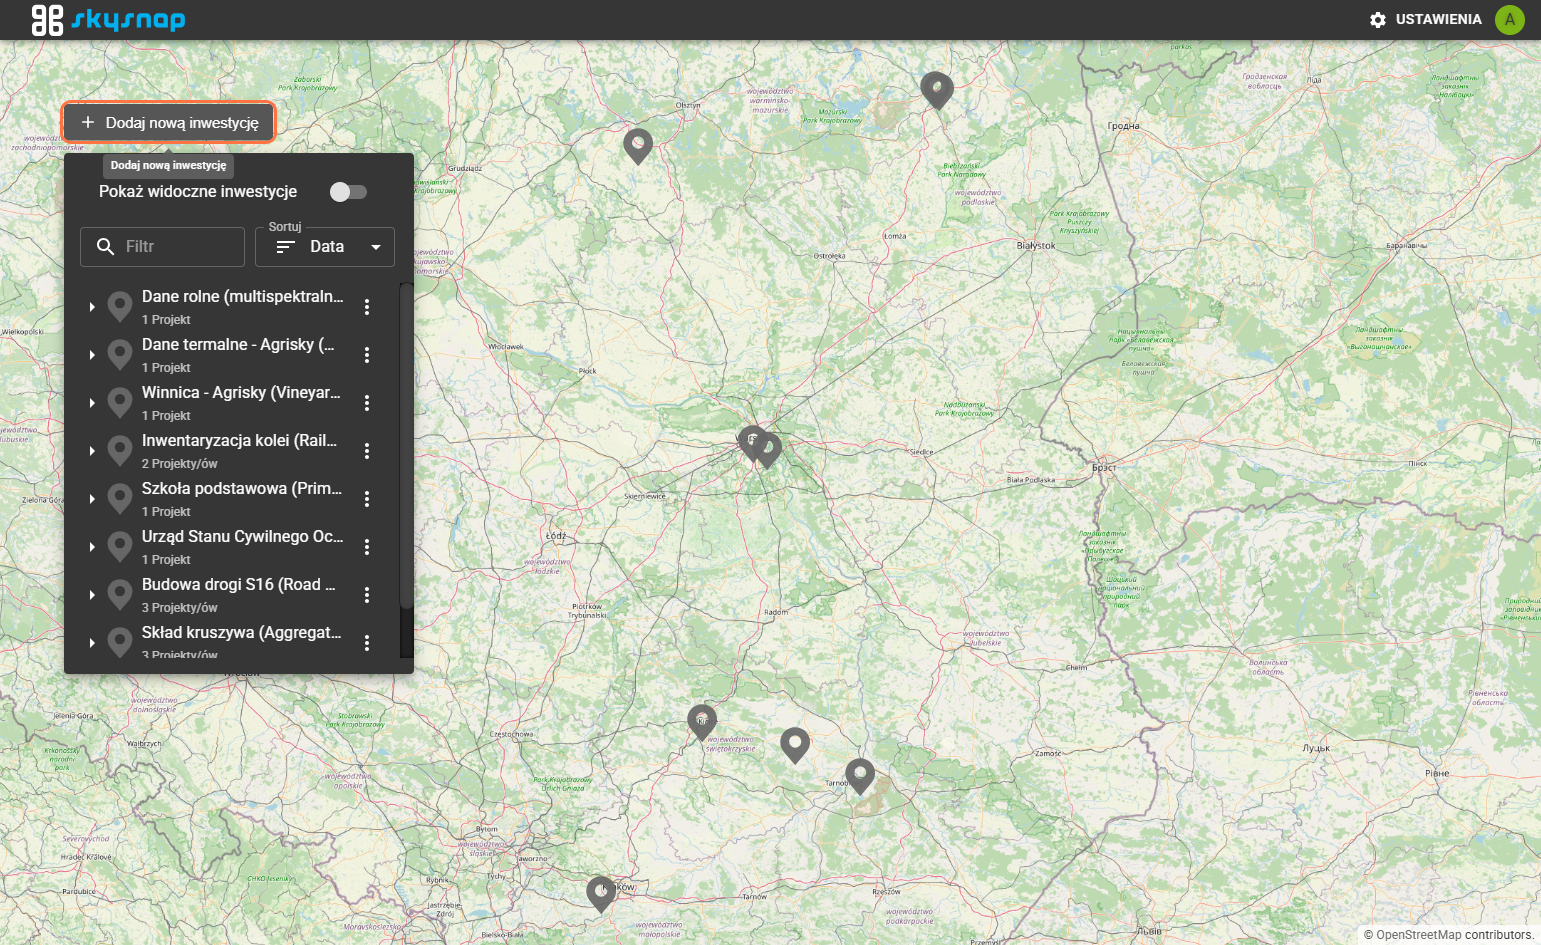
2. Enter a name for the newly created site.

3. Set the site location. You can do this in two ways:
- by manually entering the coordinates,
- by pinpointing the location directly on the map on the right side.
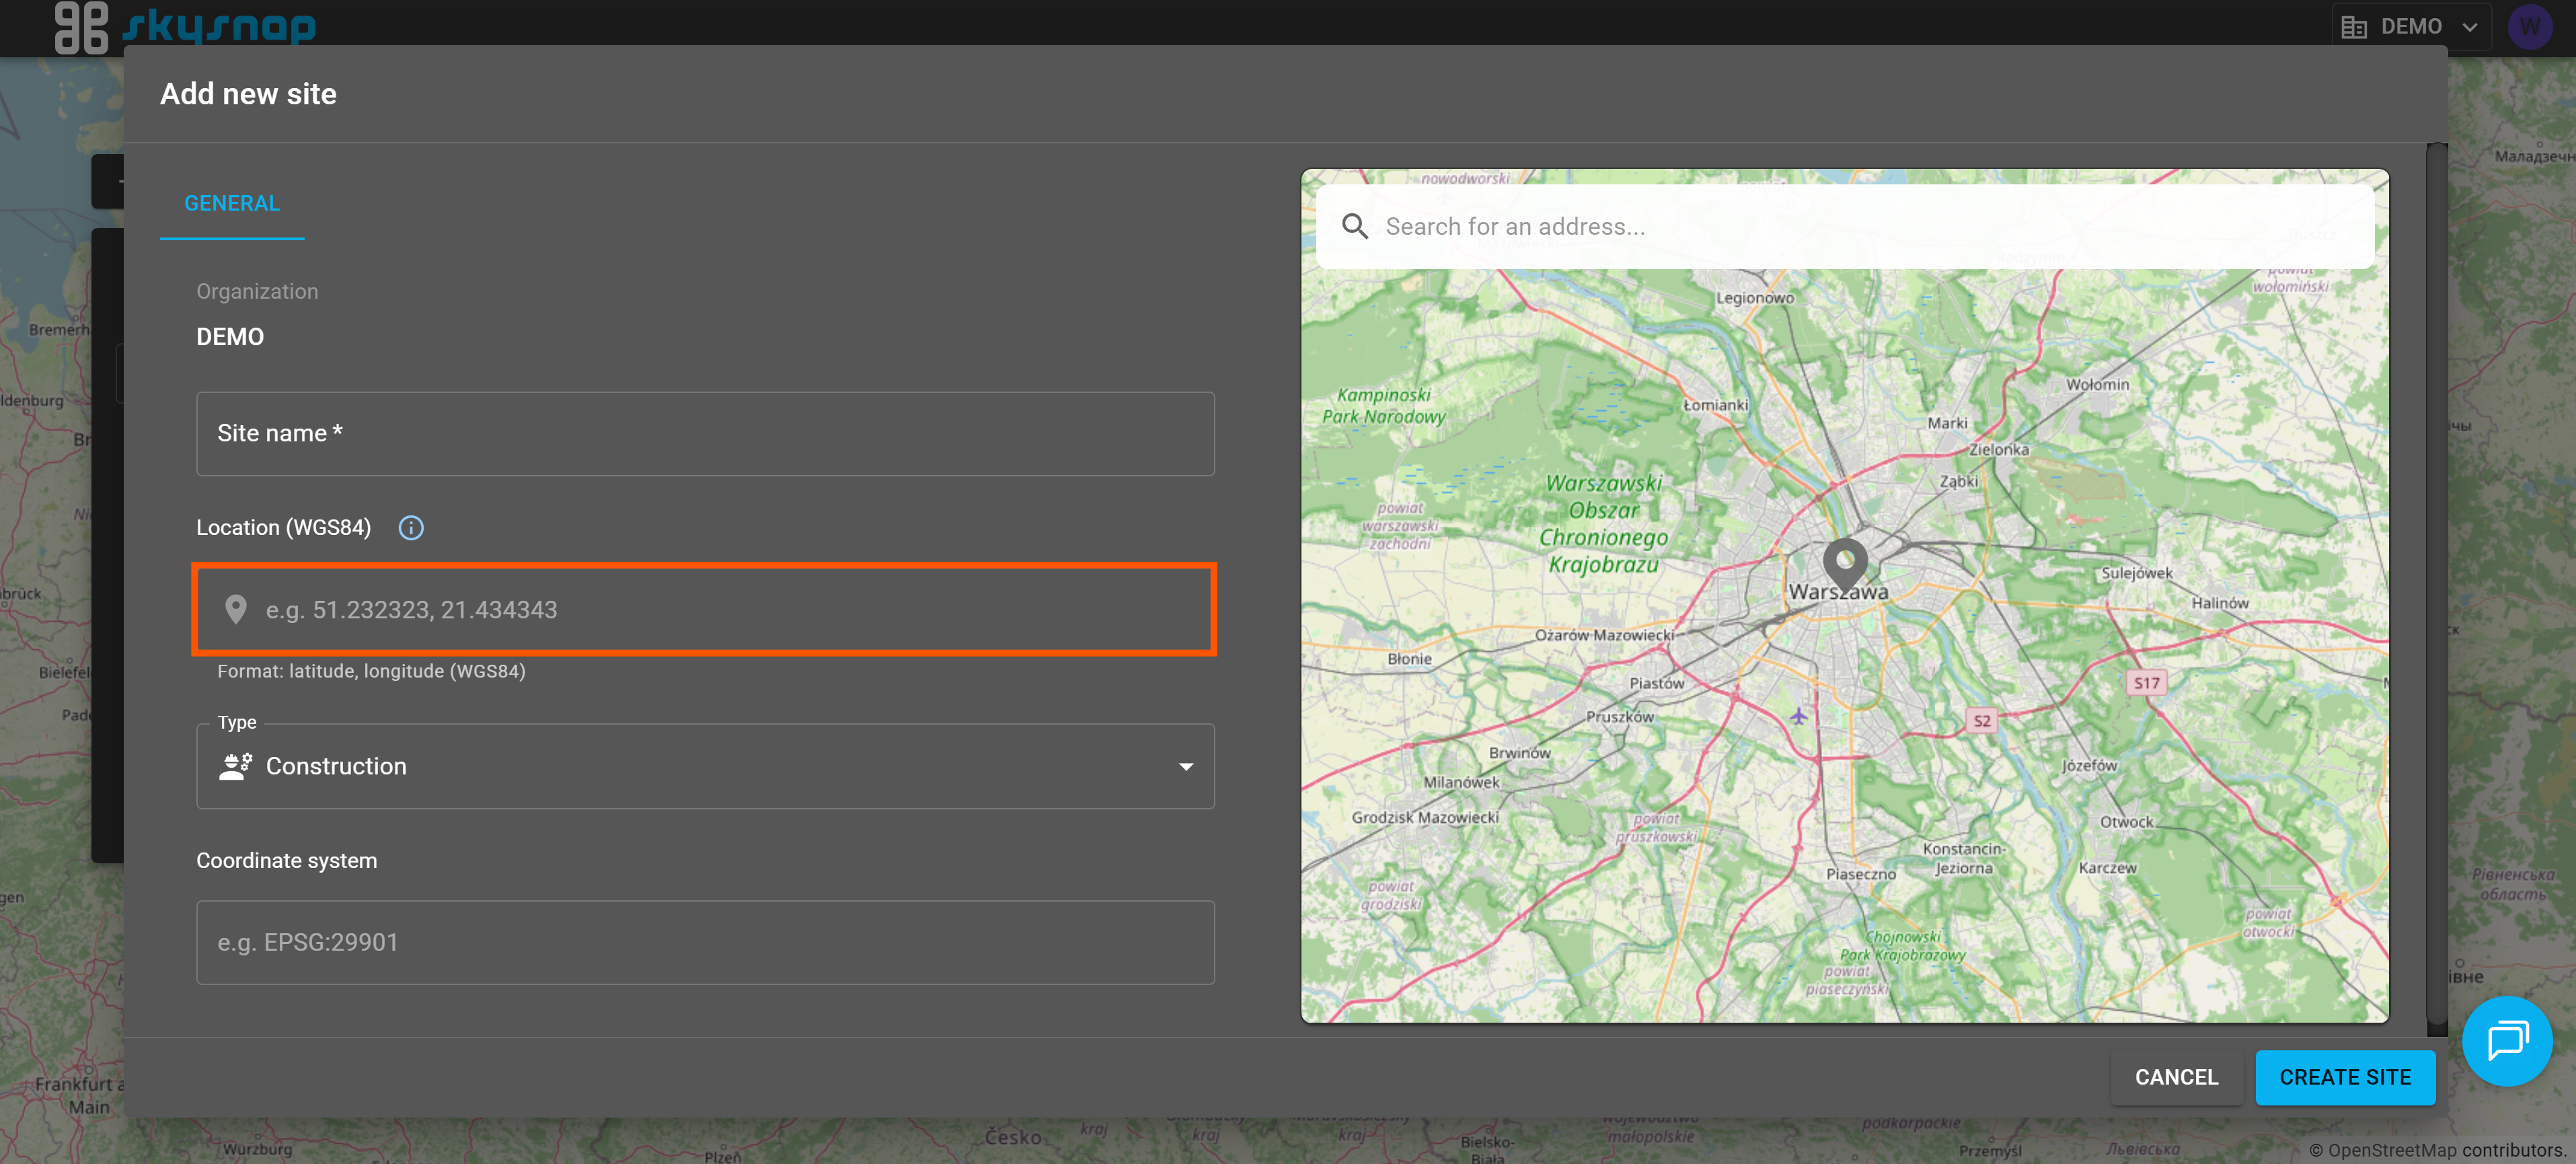
4. Select the site type.
TIP: If you are unsure which site type to choose, please refer to the article regarding site types.
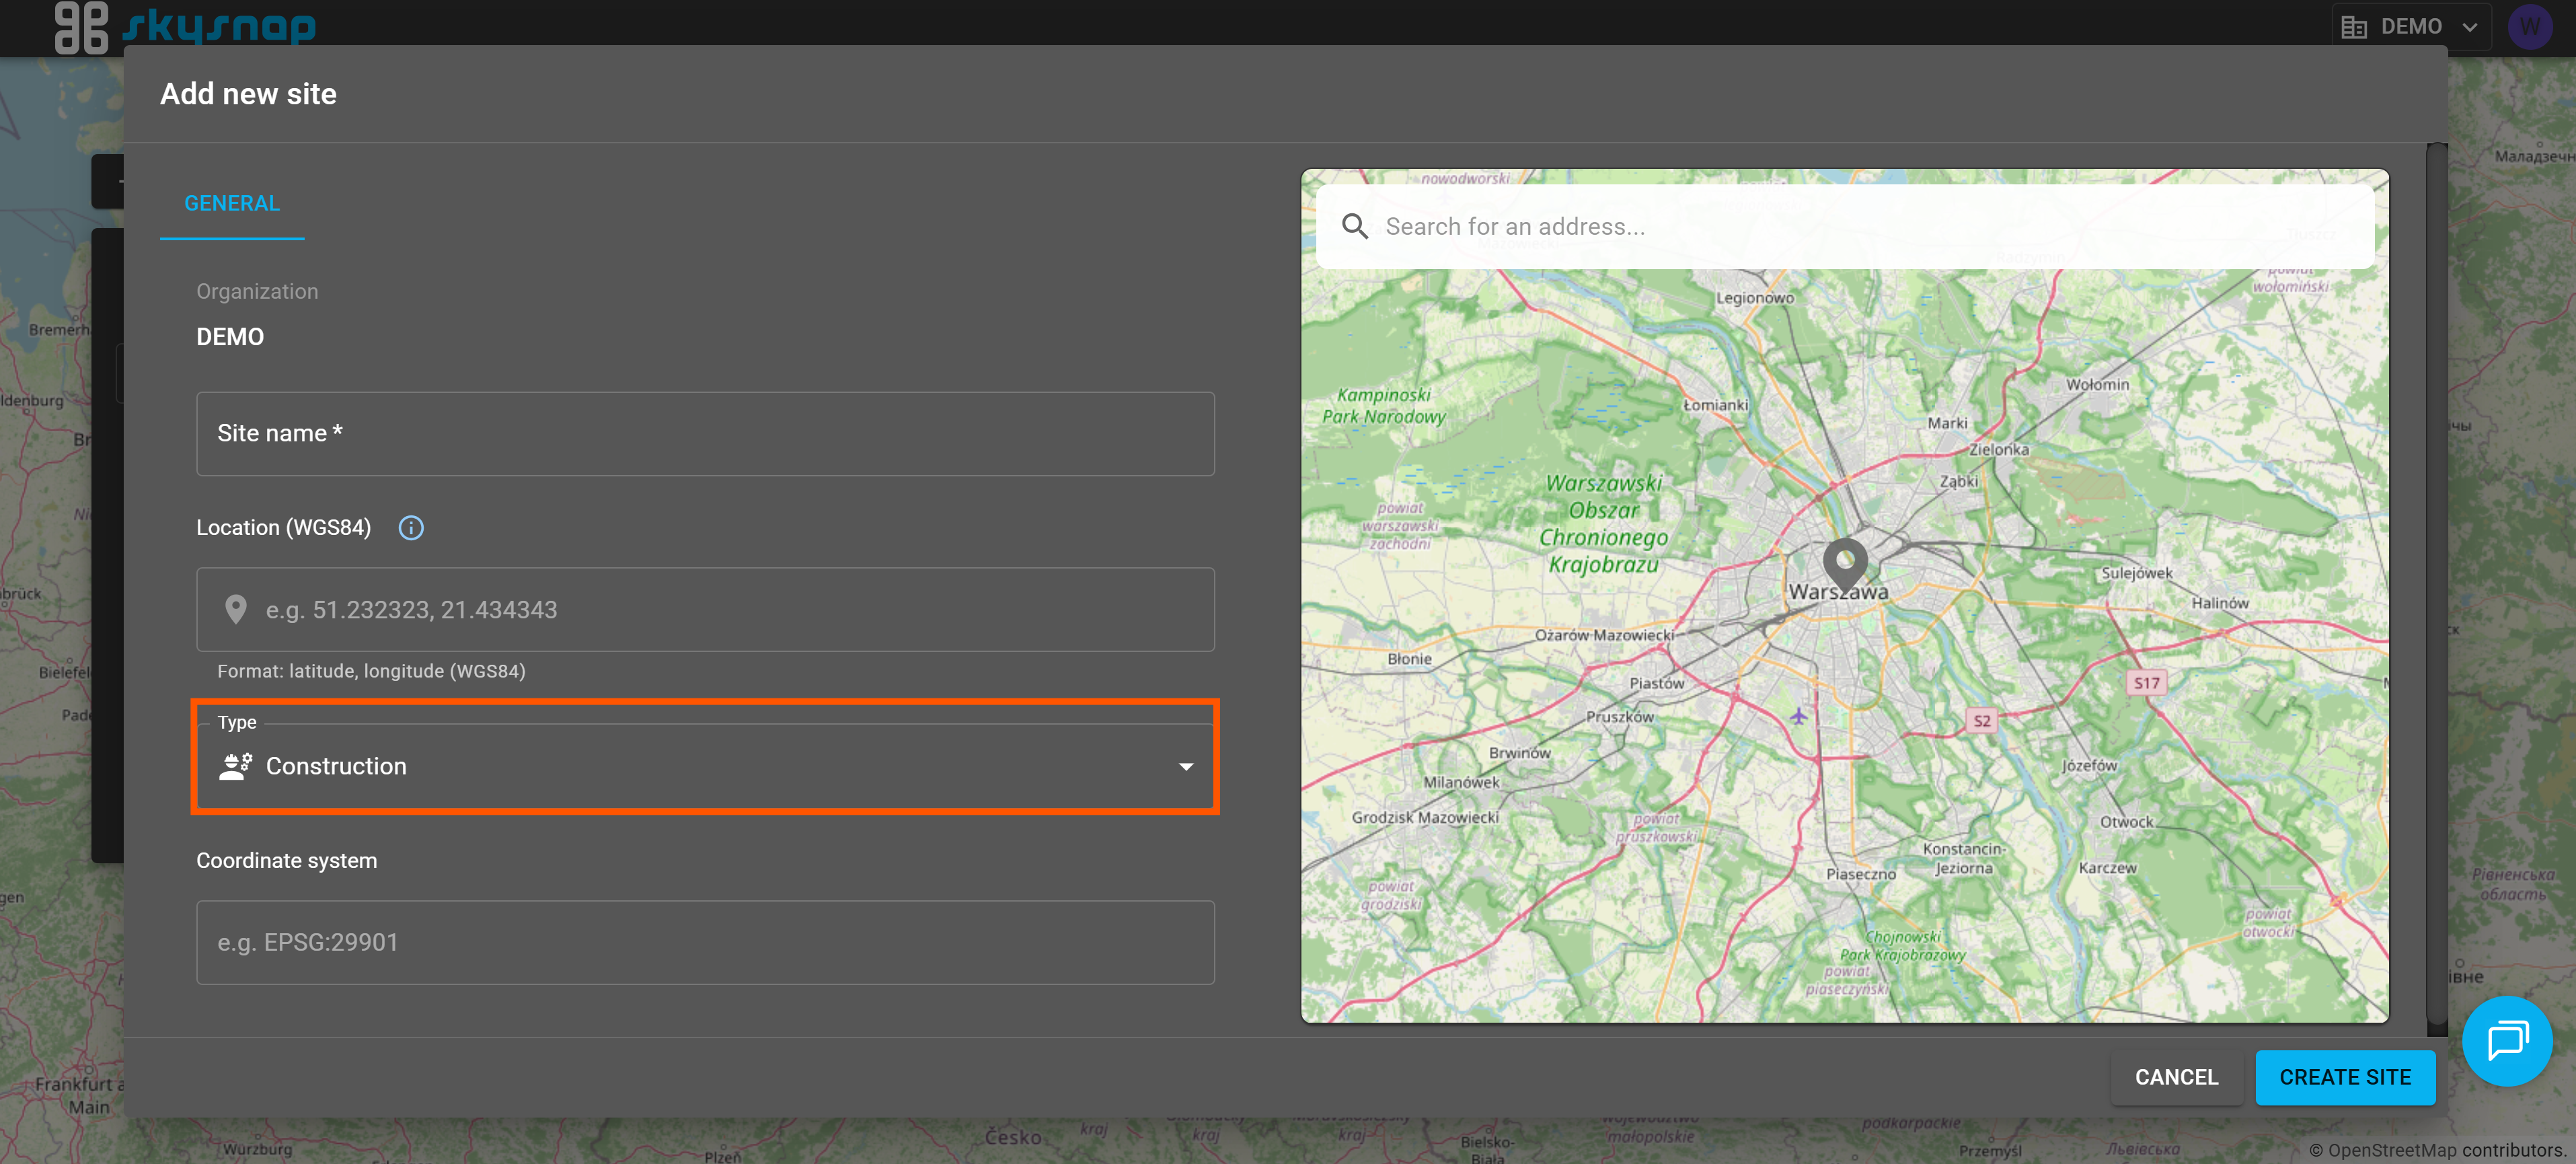
5. Select the coordinate reference system (CRS) for the site. 
When you start typing an EPSG code (e.g., 29901), a drop-down list will display the coordinate systems that match your entry. Select the appropriate reference system.
WARNING: The coordinate reference system is assigned to the entire site. This means that all data imported into this site must be prepared in the selected CRS.
If you have any doubts about which system to choose, contact us at app@skysnap.com.
6. Confirm your setup by clicking the "Create site" button. 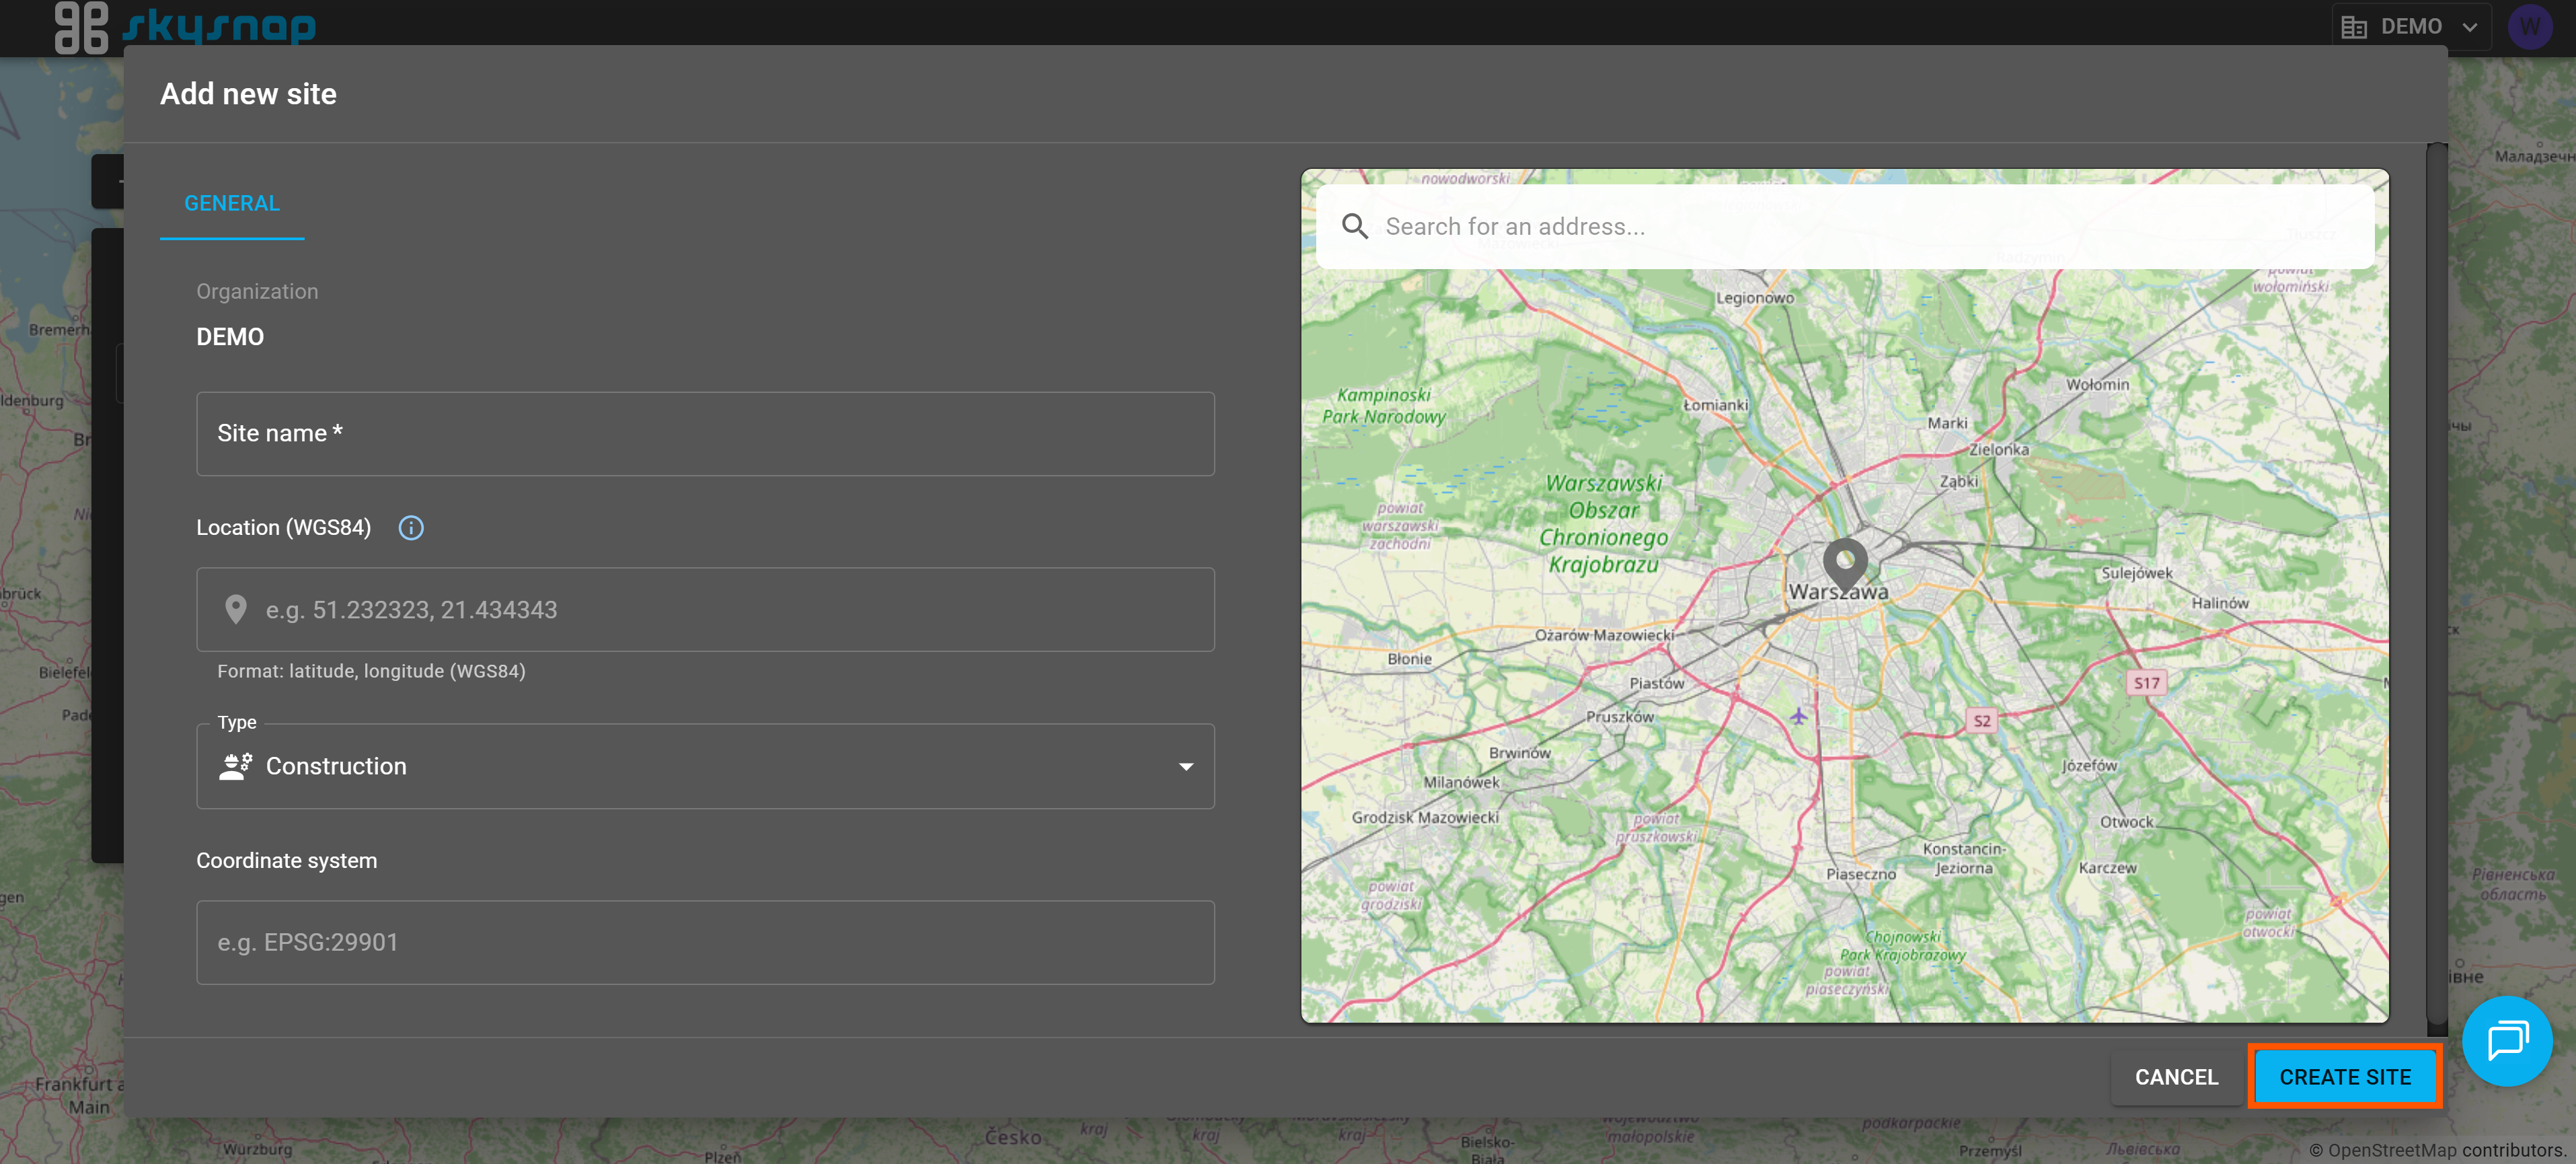
You have just completed the stage of setting up the basic data management structures on the platform. You can now proceed to create projects to collect and manage your data.