
Table of contents:
Steps for determining the average point
Introduction
NOTE: Automatic determination of the average point is available only for sites of the "Telecommunications" type.
The Average point feature lets you automatically determine a new point in 3D space based on previously indicated source points. The system calculates the arithmetic mean of their X, Y, and Z coordinates and then creates a new point at the calculated location.
This solution is useful when you want to quickly determine the central position of a selected area or group of objects.
TIP: You will find the Average point automation in the project view, in the Automations tab. It works only in the 3D view.
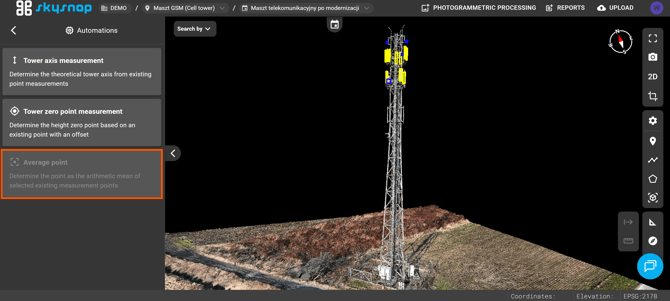
IMPORTANT: To use this feature, you must have at least 3 point measurements. If the automation tile is grayed out, it means the required measurements have not yet been made in the Analytics panel. Once you add them, the feature will be unlocked.
Steps for determining the average point
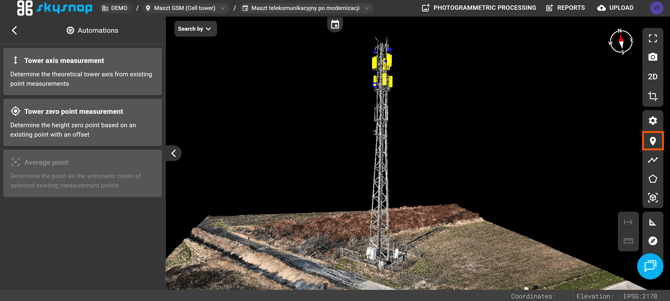
1. Add measurement points.
You can use previously saved points or create new ones. To create points, use the Add point tool and take at least 3 point measurements.
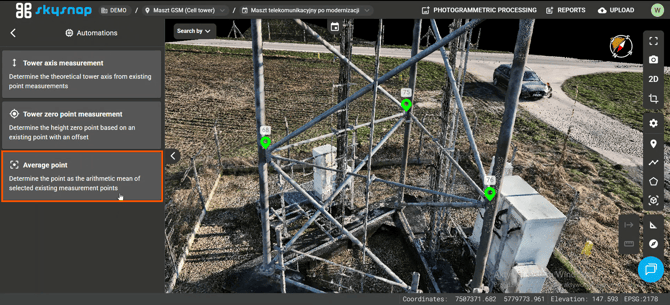
2. Select the Average point automation.
If you have just added new measurements, return to the main panel using the arrow in the upper left corner. Then open the Automations tab and select the Average point tile. If the tile is no longer grayed out, you can use the automatio
3. Fill in the form.
Enter a name for the point to be created. Then select the input points on which the system will base its calculations. From the list of available measurements, indicate at least 3 points.
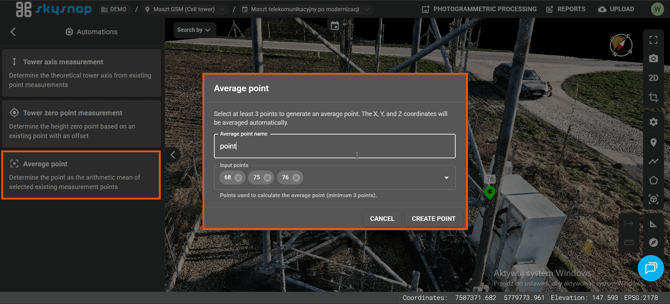
4. Click the Create point button.
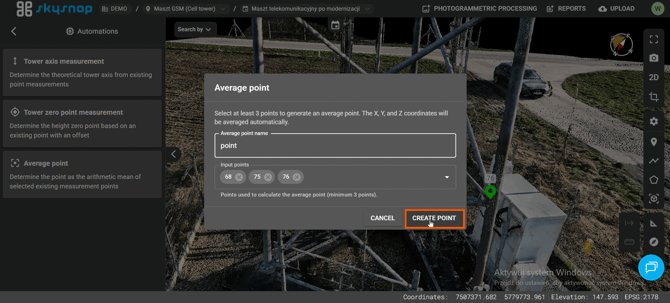
Results
After the point is created, its properties panel appears on the left. There you will find the horizontal coordinates and the height of the determined point. You can also change the pin color and decide which label is visible on the map.
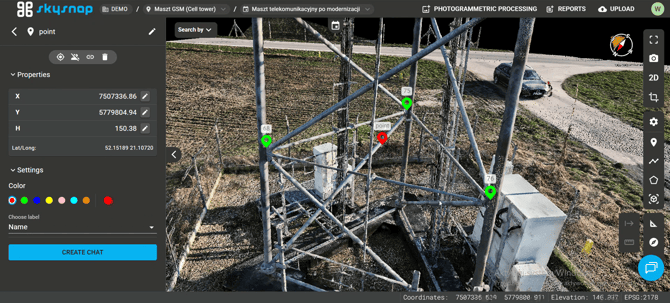
TIP: For this measurement, you can also create a geochat to exchange comments about the marked position with other users.
You will find the determined point in the Analytics panel. If you do not select a target folder for measurements using the gear icon before running the automation, the measurement will be saved in the default points folder.